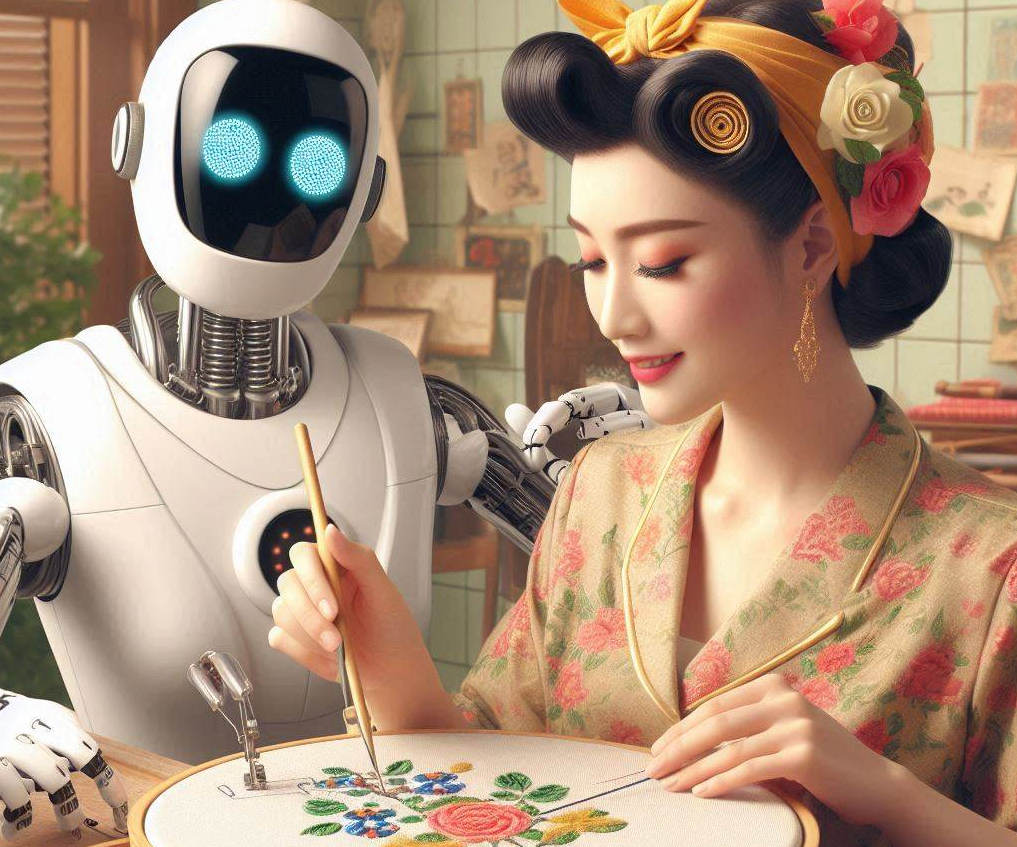
Creating original embroidery designs is now easier than ever with AI. In the past, making original images was much more challenging if you weren’t a skilled artist or didn’t have a friend who could draw for you.
The Internet then made it possible to find simple images online for free, which you could alter to create something original.
Now, with the advent of Artificial Intelligence, anyone can generate incredible original art for embroidery designs.
In this post, I will guide you step-by-step to create an image that we can turn into an embroidered design. If you have always wanted to create your own original embroidered images but don’t have any artistic talent, you’ll be making them like a pro in no time.
So, let’s get started.
What You Will Need to Create an AI Design
I understand that many of you might be worried about using Artificial Intelligence (AI) because you don’t have any computer skills. Don’t worry; you need absolutely zero technical skills for this. Here’s what you’ll need to create your own images:
- A computer or laptop
- Internet access
- A basic graphics program
- Embroidery digitizing software (If you don’t have any, I have a workaround.)
- A machine to sew on (or a friend with an embroidery machine)
I will guide you step by step through this process so you can see exactly how to get the job done.
AI Resides on the Internet
You will need internet access to use AI for creating your embroidery images.
There are several sites you can use to generate images. While many people use ChatGPT, I prefer using Copilot for writing. Copilot has an image generator built into it, but I use Bing’s Image Generator website to create my images.
For context, Bing is a product of Microsoft and functions as a search engine, similar to Google. However, Microsoft is a significant player in the AI field, and it may one day become bigger than Google.
There are two places you can find Microsoft’s Copilot and AI image generator. If you have a recent computer, you can easily find Copilot on your toolbar at the bottom of your screen.

The other place you can find Copilot on your computer is to click the little Windows icon on the far left. (See the little blue window?)
Once you click on the little Window image a menu will pop up and, you should see something like this:
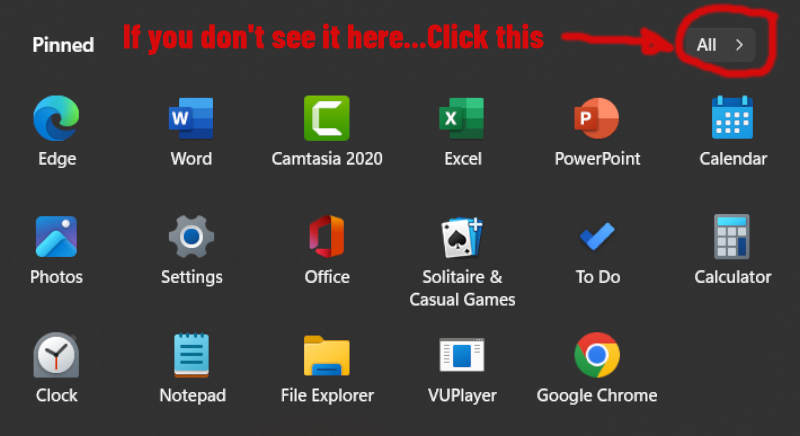
Once you click on that button, you will see a drop-down menu and under the letter “C” you will see copilot and its logo.
How did I Get AI Onto My Computer?
My wife needed a new laptop because her old one was running slow and was outdated.
So, we bought a new one last week. As we started it up for the first time, something interesting happened—we needed to have a Microsoft account to use it.
Since Windows is the operating system, Microsoft requires an account to use the computer. (I love Microsoft products, but to me, this seems like a lot of control. But that’s just my opinion.)
Almost everyone has a Microsoft account, but many people forget that they do. When we logged my wife into the new laptop, she had her Microsoft account email and password, thank God.
Otherwise, she would have needed a new account, and it would have taken us longer to set up her computer.
Once all the necessary downloads were finished, I immediately noticed that the Copilot application was on her bottom toolbar.
You’ll Get AI Even If Your Computer is Older
My computer is older and one day I woke up to find that Windows had updated itself over night. So, when I looked at the task bar at the bottom of the screen, I saw the Copilot logo on there. It had inserted Ai into my laptop.
So, whether you want to have Ai on your computer or not, if your laptop or desktop has it of not, chances are you’re going to get it. It’s just the wave of the future.
What To Do If You Don’t Have AI Installed
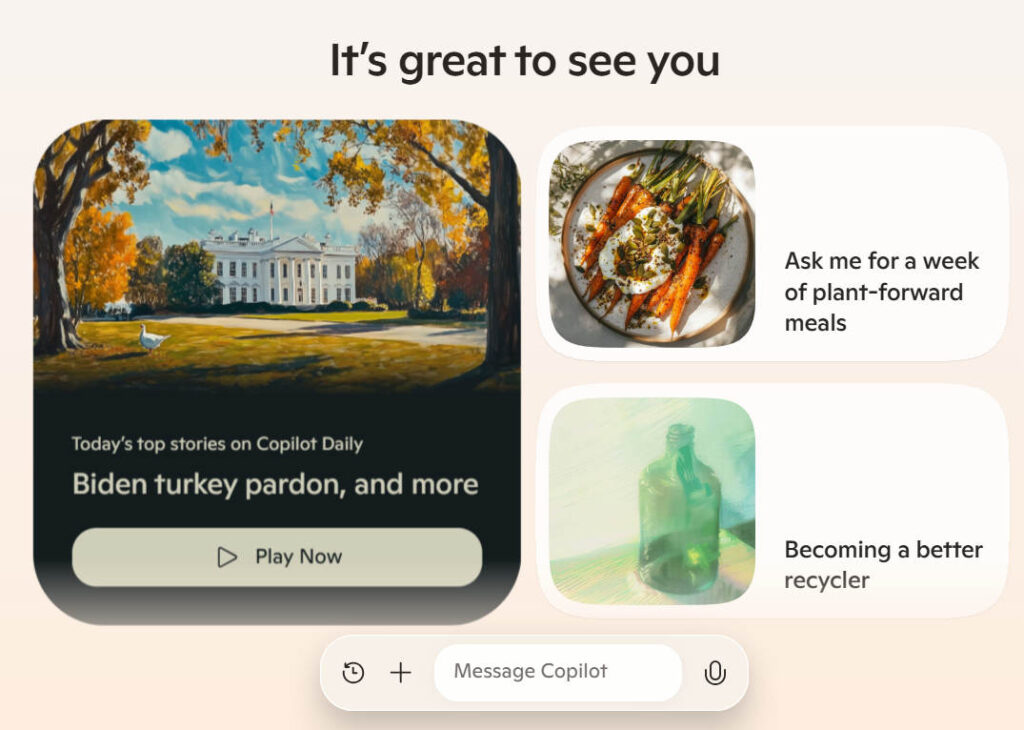
If you’re computer doesn’t have an AI app on it, don’t worry, because you can always use the Internet versions of AI. Here is a link to Bing’s Copilot Image Generator
Once you click on that you should be taken to a screen that looks something like this:
Now, this is where the fun begins.
Using AI to Create Our First Image
Now, we are at the point where you can start using AI to help you create your first image. When I use artificial intelligence generators to help me create a design I give it very explicit instructions.
For example, if I tell it to create am embroidered unicorn flying through the sky for an embroidery project, that’s exactly what I will get.
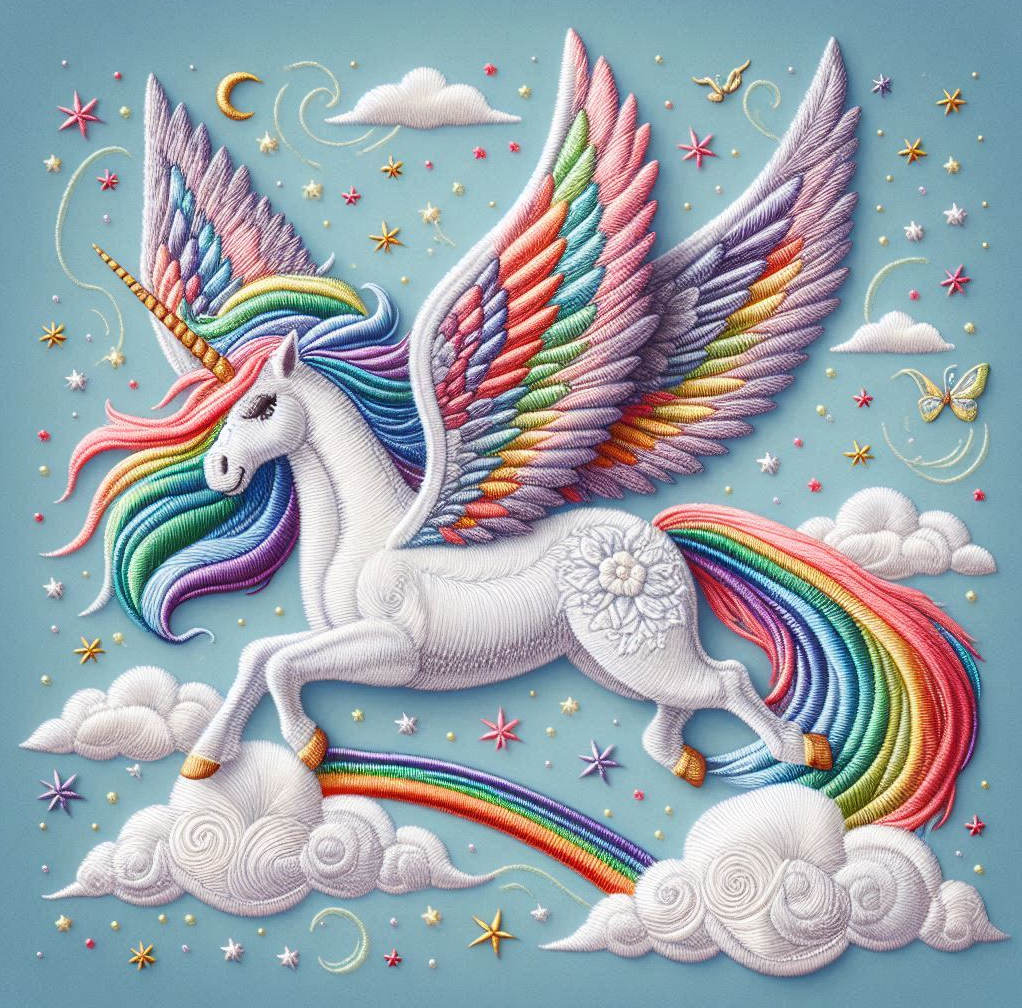
Notice that it actually looks like an embroidered image. Yes, you could use this image to digitize with, but you are talking about a lot of stitches, jumps, and color changes.
On top of all that, it would take you a very long time to digitize an image that looks like this.
Think Minimalist in Your Work
The best way to create an image using AI is to ask it in a way that it will create a simpler image.
There is all kinds of advice online on how to write “prompts” that gets AI to give you specifically what you want.
You don’t need to do all that, all you need to do is ask it specific things.
Here is the prompt I wrote for Copilot:
“Please create a simple line drawing of a flying unicorn with the lines drawn in white against a black background.”
Here is the image that it gave me:
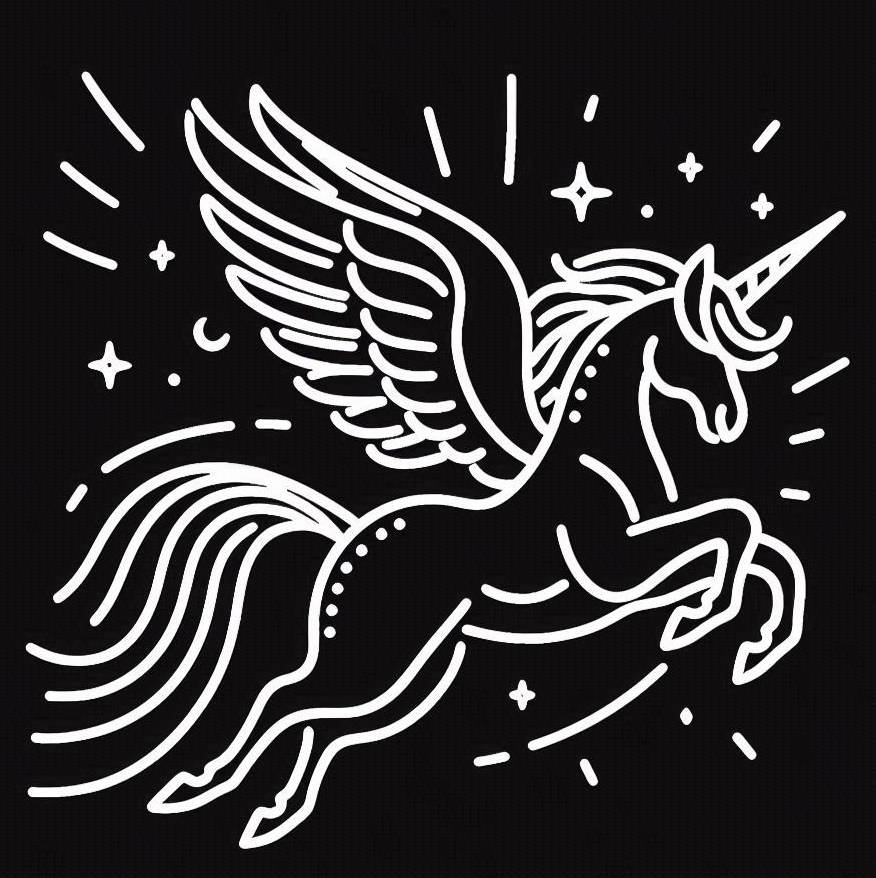
Now you could take this image and digitize it and make the white lines any color you want.
For example, if you had a light red material to sew on, you could make the lines of the unicorn dark blue, or black.
But what if you wanted a more realistic image what could you do then?
In this case the next question I would ask Copilot would be this:
“Please create a simple yet realistic line drawing of a flying unicorn with the lines drawn in white against a black background.”
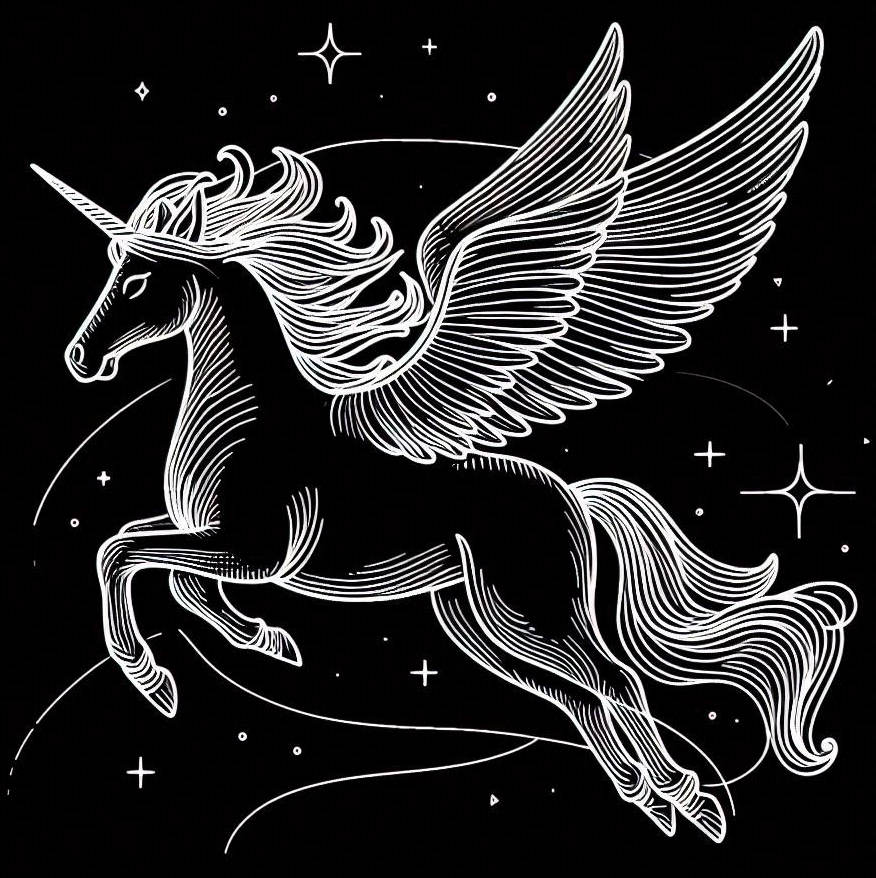
You see, you have to ask it exactly what you want it to produce.
And a lot of times you have to use trial and error to get exactly what you want.
Put Your Image Where You Can Find It
Once you have your image the way you want it, save the file into a location on your computer where you can easily find it. (I’ve got so many files, I usually put my images directly on my desk top so I know exactly where they are.)
Once I’m done with the image, I’ll either save the image to an external hard drive or flash drive, or I’ll delete it. But if you have a good filing system, you can put them into another file.
Drop Your Image into a Photo Editing Program
Once you have completed your program, you may want to put it into a graphics program like Windows Paint that comes with your Windows operating system.
I’ve got Windows 10 on my computer and this is where you can usually find it on your computer:
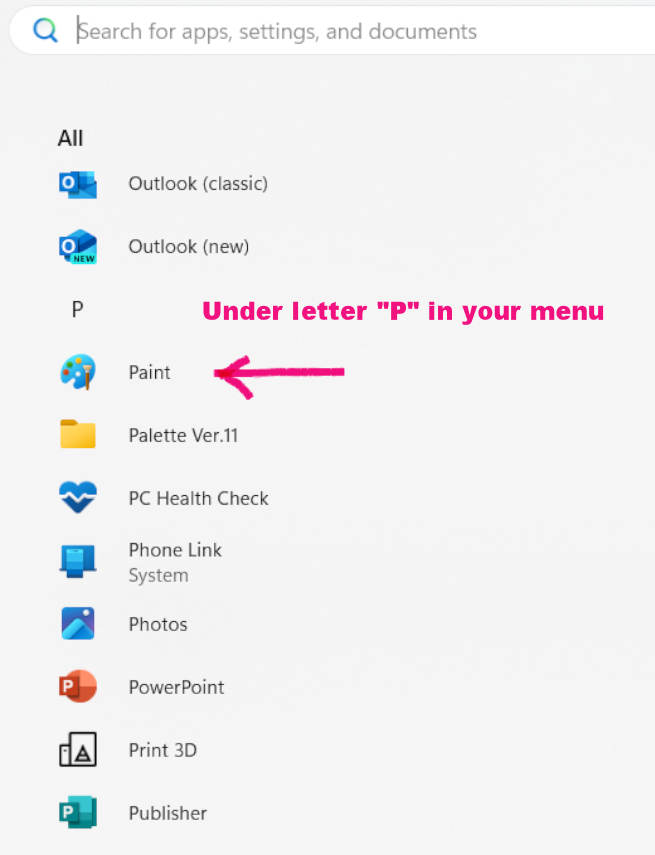
Click on that icon and you should see a program like this:

From there you can go to File à Open à Desktop (or whatever location you chose.) à Name of file
The Graphic Program I use to make Embroidery Designs
Since the Paint program on Windows is free, it’s kind of limited.
If you are going to make your own embroidery designs, I recommend getting a good graphics program like Corel Paint Shop.
You don’t need a high-end program like Photoshop, Photoshop is so deep and amazing it is frightening and unless you want to spend several years learning it, I’d go for something more user friendly.
Plus, Adobe Photoshop is pretty expensive, versus Corel’s Paint Shop which can be purchased for around $40 USDs.
One of the things I like to use Paint Shop for is to add words or names to my design, like this:
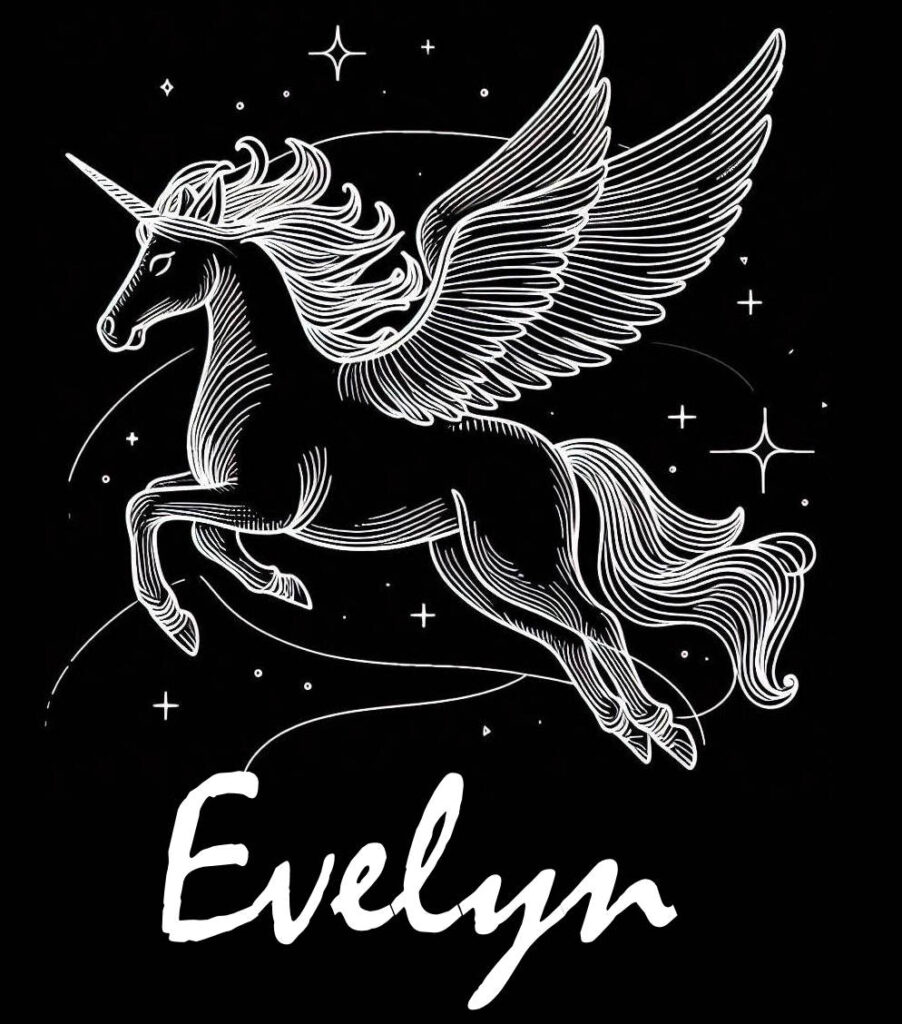
Once you’re familiar with the program, you can add letters to your image in a matter of minutes.
Digitize Your Image for Sewing Out
The next step in using AI to create images for your embroidery designs is to digitize it using software.
If you look at the image above, it is not highly complex and it could be all sewn out in one color.
Note: As I mentioned in my introduction, if you don’t have digitizing software, I have a simple hack to get around this, so please bear with me.
The reason why I’m doing so simple of a project is so that this demonstration will be so much easier for me to demonstrate here.
To be honest with you, I don’ t like doing 50,000+ stitch designs, because those are for really big projects.
I once digitized a beautiful eagle for my son’s jacket, and it was very nerve racking. If for some reason the garment doesn’t sew out right, then the entire jacket is going to be trashed.
So, I have completed some big embroidery designs in the past but my preference is to keep them smaller and easier.
I’m using Palette 11 software, which is one of the easier digitizing programs on the market. Some of the higher end digitizing software packages are more complex, and will run you $2000+, and I have even seen some at the $10,000 level.
Here’s a video of how you can easily digitize an image and turn it into an embroidered design:
What to Do if You Don’t Have Digitizing Software
If you don’t have digitizing software and don’t know how to digitize, then the solution is very simple – hire a digitizer. There problem solved, I am a freelance digitizer myself and I’ve taken quite a few courses on how to properly digitize images.
It is not as easy as you think, and it not only requires software, but also expertise in using the software to make the embroidery designs.
I’m not going to go into how to digitize an image for you, because that would take a rather extensive post to do so. So, I’m just going to show you the basic steps of this project.
Ok, once you have your image cropped, saved, and any other things you need to have done to it, the digitizing will begin.
Just to keep it simple, I’m going to digitize the image in one stitch color without any fills.
It’s Just This Easy To Create Embroidery Designs Using AI
As you can see this isn’t rocket science. All it is a matter of using the right words to get the image that you want using artificial intelligence.
One easy hack for using AI to create images is to ask Copilot how you should ask for it, but use this version of it to ask questions: Copilot Chats.
(Sorry, I forgot to mention that there are two different versions of Copilot.)
The way I learned to use Copilot was I asked it, “What kind of prompts can I use to get different styles of art from your image generator?” And it gave me a list of things like this:
Words and Phrases to Use for Embroidery Designs
Realistic Portrait: “Generate a realistic portrait of a young woman with curly hair and glasses, sitting in a cozy coffee shop.”
Abstract Art: “Create an abstract painting using vibrant colors like red, blue, and yellow with swirling patterns.”
Fantasy Landscape: “Illustrate a fantasy landscape featuring a majestic castle on a floating island surrounded by waterfalls and mystical creatures.”
Vintage Poster: “Design a vintage travel poster for Paris in the 1920s, showcasing the Eiffel Tower and classic cars.”
Comic Book Style: “Draw a comic book cover featuring a superhero in a futuristic cityscape, ready for action.”
Impressionist Painting: “Create an impressionist painting of a serene lake at sunset, with soft brushstrokes and pastel colors.”
Pop Art: “Produce a pop art piece inspired by Andy Warhol, depicting a colorful, repeated image of a famous celebrity.”
Surreal Scene: “Generate a surreal scene with melting clocks, floating islands, and unusual creatures, inspired by Salvador Dalí.”
Minimalist Design: “Create a minimalist poster of a cat sitting on a windowsill, using simple shapes and muted colors.”
Science Fiction Illustration: “Illustrate a futuristic city with flying cars, towering skyscrapers, and neon lights.”
So, play around with it for awhile and see what you can come up with.
One other thing worth mentioning is that the chat version of Copilot can give you images, too. However, you’ll have to sign it to use it.
Conclusion
I hope this inspires you to dive in and use AI to help you design all kinds of great embroidery designs. There are all kinds of other AI generators online, but a lot of them are getting complicated to use.
I like using Copilot because it is simple and gets the job done for me. Once you get finished learning AI, get a cheap graphics program like Paint Shop and learn how to alter your images further. You’ll be amazed at all of the incredible designs you can come up with.
Please let me know if this post helped you out and if there is anything you would like to add, please be my guest; it would really make my day.
Cheers to Your Creativity!

